DIY: Bacon Costume
This year for Halloween, my older kids (now almost 9 yrs and 11yrs old) blasted me with scornful glares when I suggested helping them with their costumes.
As the creator of the epic Vampire Zombie Robot Dragon costume (glowing fangs!) from years 2008-2011, I was momentarily heartbroken, until I remembered up-and-coming Kid#3 who, at 2.5yrs, is just entering his Halloween Golden Era.
I tossed around a few ideas with her, but the one that seemed to excite her most was Bacon. As her father is the 1st Place winner of the 2011 Hart & Thistle Bacon-Off, and as my 2yr old is such a ham, it seemed a remarkably appropriate choice.

We live in Ottawa, ON, so all our costumes have to be able to a) fit over winter coats, and b) be water-resistant. Armed with little more than an idea, and not a whole lot of time, I headed to the fabric store...
(I apologize for the darkness of the photos -- in true Mother-of-Three form, I was sewing this costume well after midnight, while everyone else was tucked into bed fast asleep!)

Supplies:
3m of iron-on interfacing
3m of cream colored felt
1.5m of maroon felt
maroon and cream thread
scissors
sewing machine
iron
safety pins
snap press
snaps (cream and maroon)
Step One: To determine how much material I would need to use, I measured my 2yr old from where I wanted the bottom of the costume to land (mid-calf) to where, above her head, I wanted the top -- this worked out to a little more than 1.25m. I multiplied that by 2 (making 2.5m) and added a generous allowance for hemming and multi-sizing the costume with a snapped-up bottom. This worked out to roughly 3m for the base colour (cream) and the interfacing. You need half as much material for the maroon.
Note: This costume will fit most 2yr-4yr olds. For a larger child, or an adult, this will require more material.

Step Two: This was easily the hardest and most frustrating part of making this costume -- ironing on the interfacing. The interfacing is important, as it ads stiffness to the felt and will help it to hold its shape when being constructed, as well as when worn.
It took forever -- mainly because I have a sad little half-sized table top ironing board and initially (oops!) forgot to add water to the iron. I was being a slacker-crafter and didn't pin the two pieces of fabric together, either -- this would have made it easier to keep everything lined up properly.
Tip: Learn from my mistakes: use steam and use pins!

Step Three: This step involves some freehand cutting of wavy lines -- the 1.5m of maroon fabric needs to become the meaty bits in the bacon.
Cut at least half of the meat strips from the full length of the felt, and then cut some smaller pieces to fill in the empty spots. I used scissors, but my rotary cutter would have made this a lot faster.
Make sure at least one wider piece goes down the center of the costume. Place them onto the base fabric and pin them in place.
Tip: I found the felt was quite thick and pinning with safety pins down the center of the strips worked best.
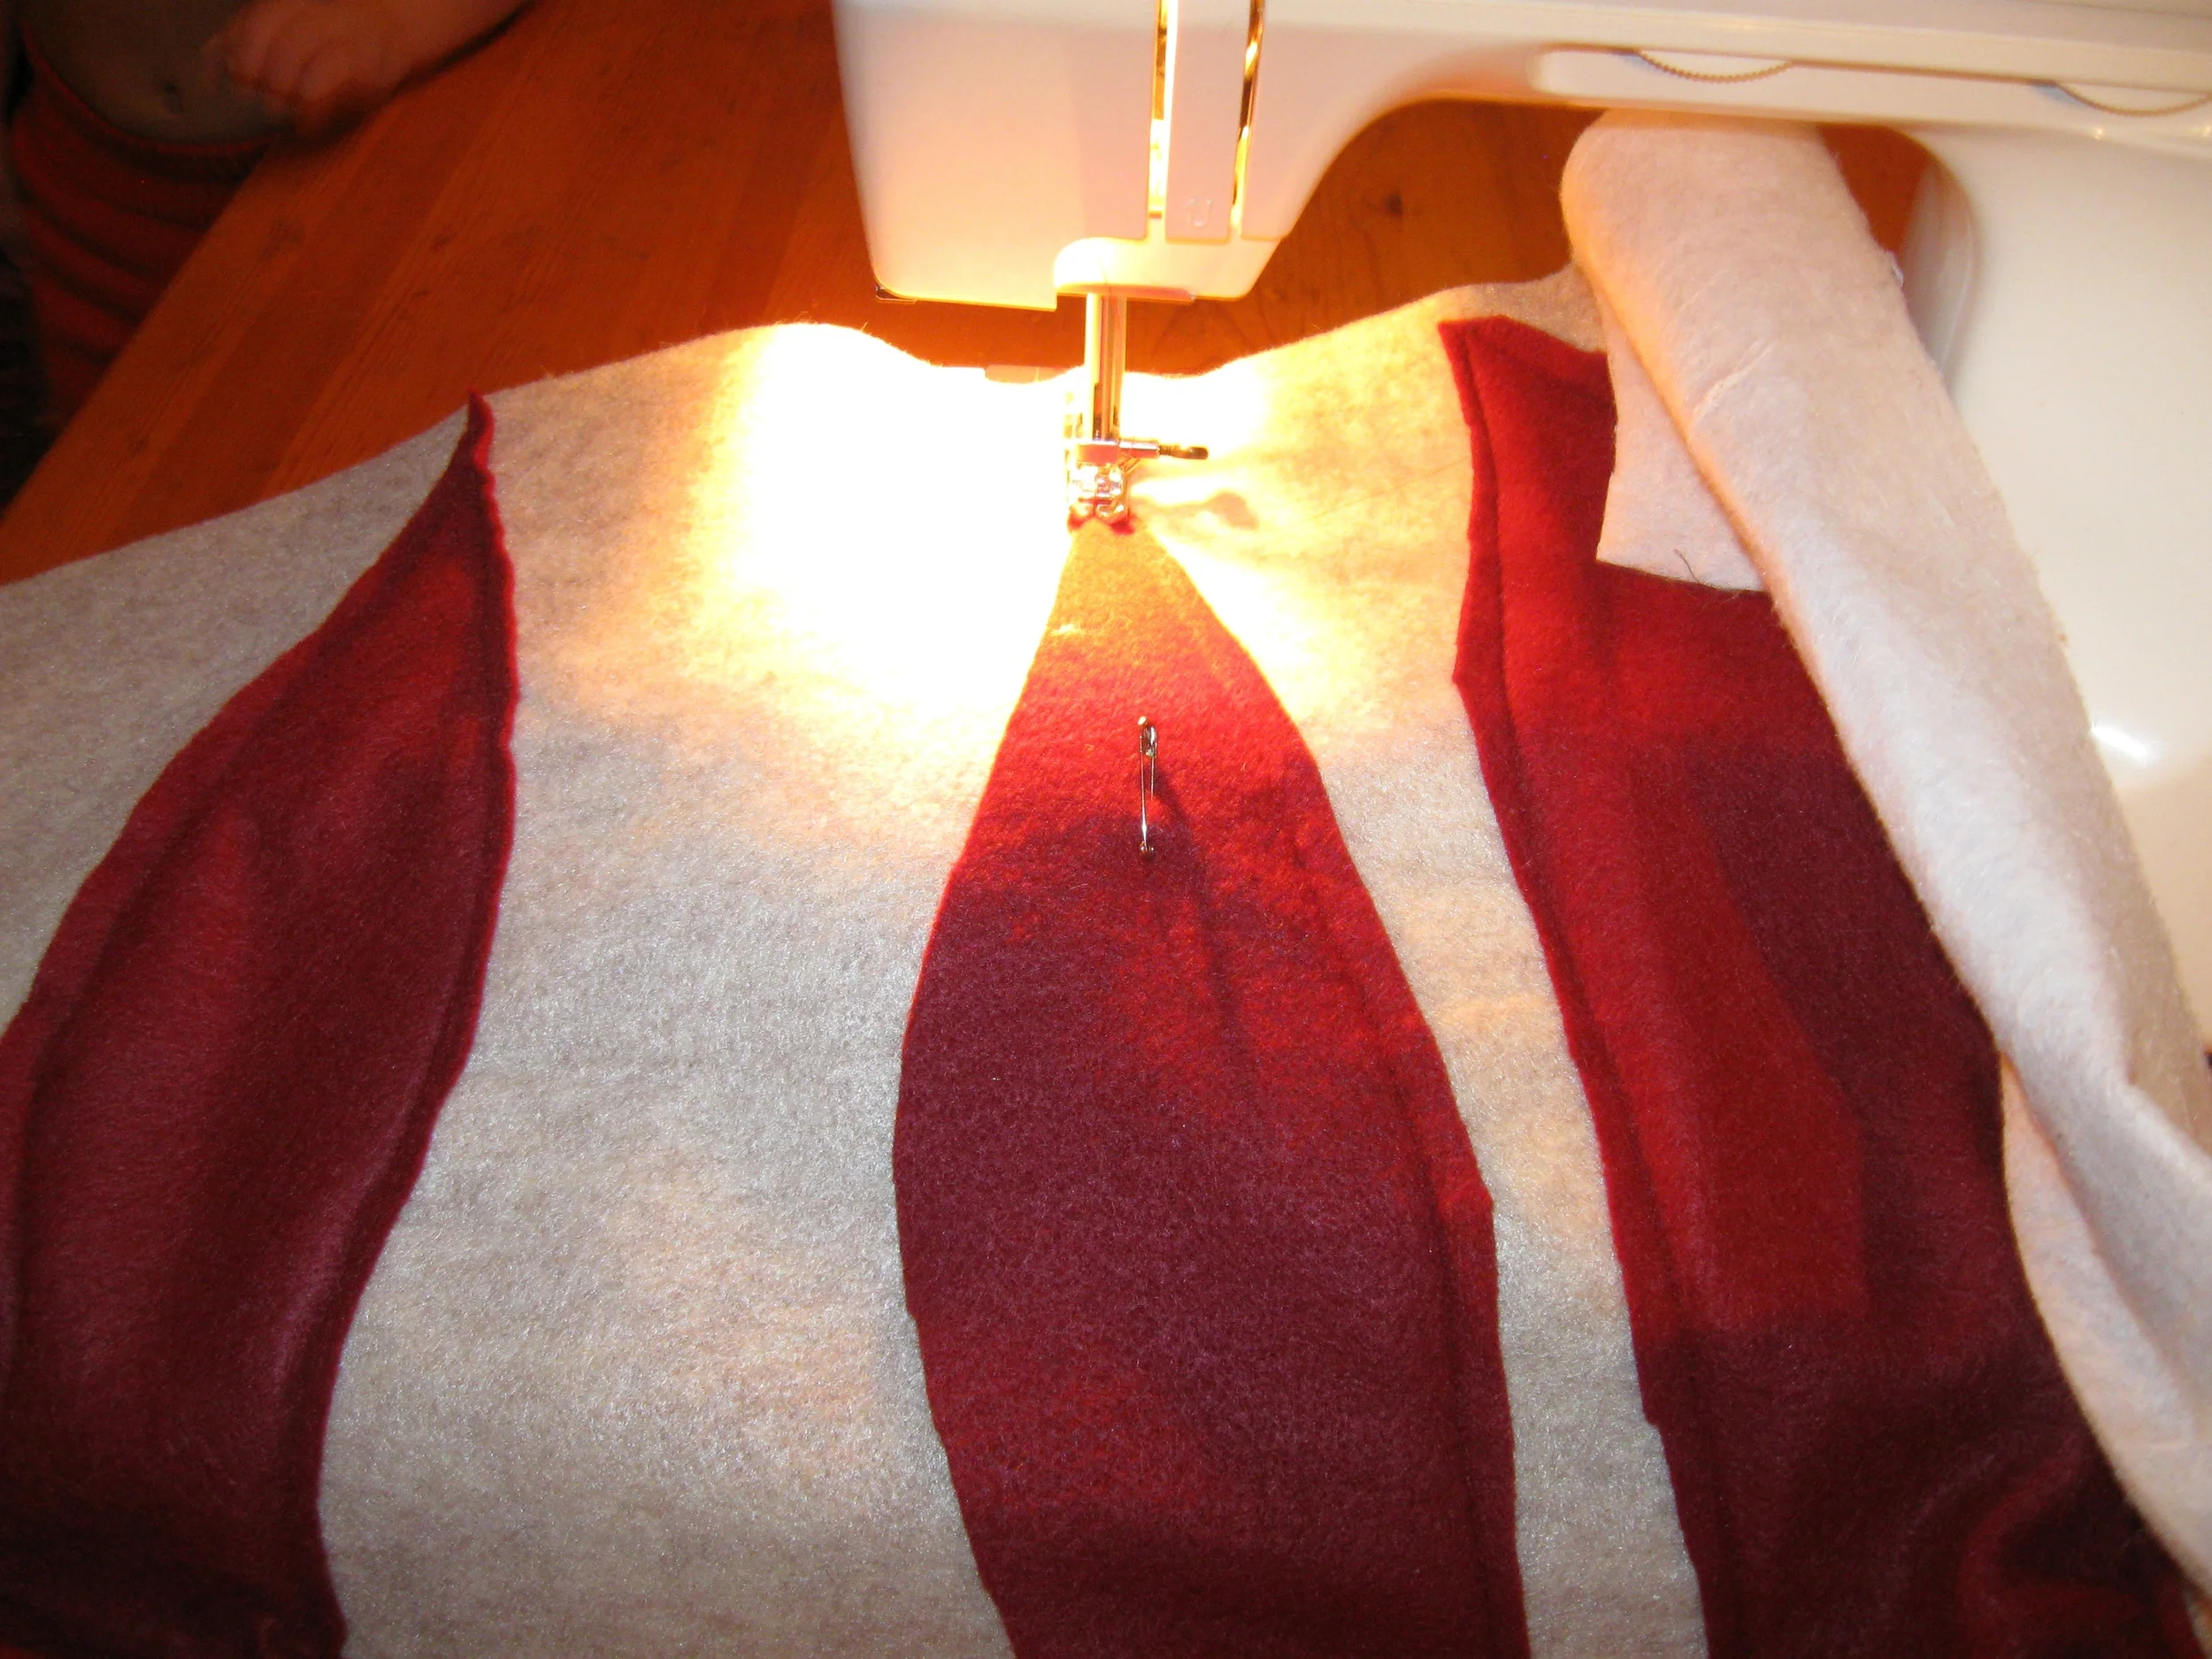
Step Four: Now it's time to haul out the sewing machine and top stitch the meat pieces to the base layer. This is a little time consuming, primarily due to the amount of fabric, but isn't challenging and doesn't need to be perfect. Don't forget to trim all the loose threads before moving to the next step!
Tip: If your machine has a tendency to chew fuzzy fabric, I'd recommend sliding a layer of tissue paper underneath while sewing.
This technique is also helpful when it comes time to turn and top-stitch the edges and hem.
Step Five: Hemming (and, possibly, some hawing).
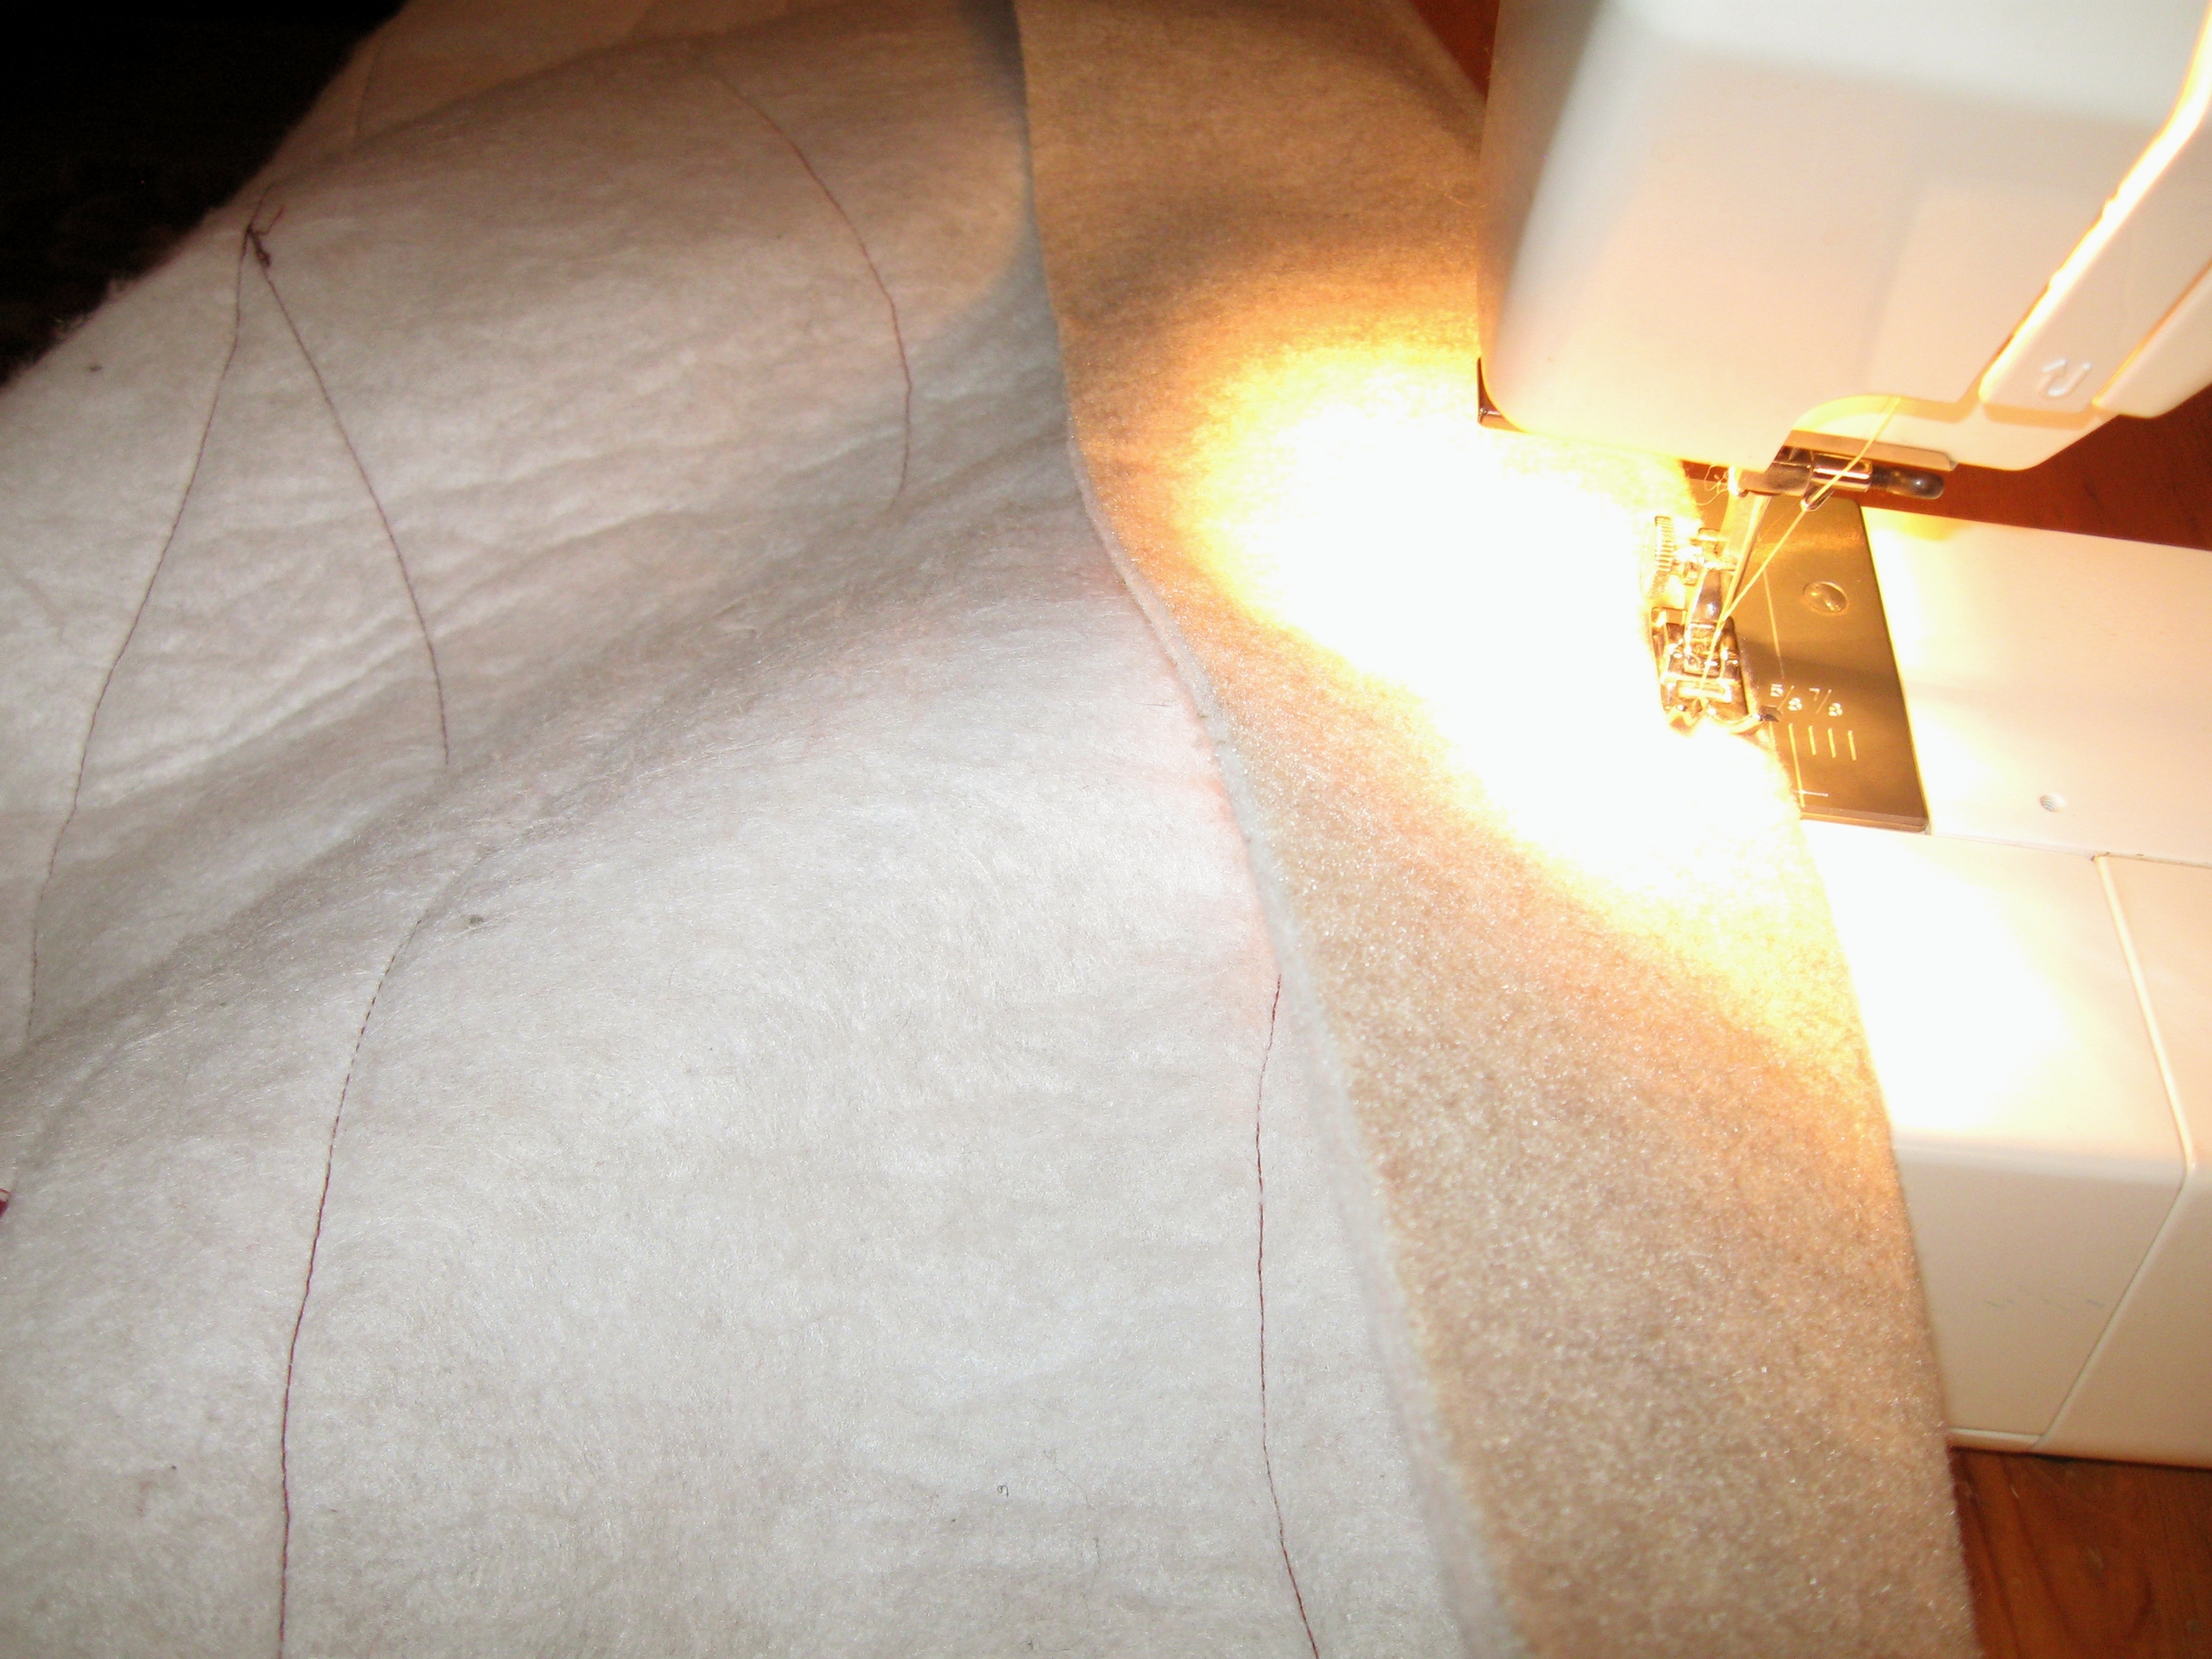
As with many of my "eyeballed" projects, I don't have specific measurements for seam allowances. I folded about a 3" (approximate) portion of the felt over and top-stitched along each of the longer sides.
I should have hemmed the bottom, too, but this slipped my mind. If I ever make another bacon costume, I will TOTALLY hem the bottom but, alas, this one was made by a caffeine-powered, slacker-crafter, Mother-To-Three in the wee (and then not-so-wee) hours of Halloween morning.
Pro-Tip: Don't procrastinate. Give yourself lots of time. Every time you take a sloppy shortcut, somewhere a Home Ec teacher cries! S'truth.
(I apologize for my sloppy sewing, Mrs. Cameron and Mrs. Spindle, you taught me better than this!)
Step Six: Turning and top-stitching those edges a second time.
This is where you determine the fit of the costume and create the flap for mounting the hidden snap closures. What you decide to do depends entirely on the size of the person wearing the costume and the width of your material.
What worked for us was measuring the torso circumference of my 2yr old wearing her winter coat, adding 8", and dividing in half. Sadly, I can't recall what this measurement was, as I failed to make a note, but I really didn't stick that hard and fast to it anyway. Subtract that measurement from the width of the costume -- divide the remaining number in half. This tells you how much material to turn under and stitch in place on each side.
For example, if that measurement was 24", and the width of your materiel was 36", you would be left with 12". This means you need to turn under and top-stitch a 6" wide section along each of the longer sides of the costume.
Pro-Tip: Get this measurement BEFORE your 2yr old goes to sleep for the night. It's really hard to get it AFTER she's asleep...
Step Seven: Adding the snaps.
I love my snap press. It comes in handy for moments like these. If you don't have one, you may be able to rent one from a local craft store. If possible, get snaps with longer studs -- it will be easier when snapping through felt.
Fold the costume in half, wrong side out. Determine where the arms will come out the sides of the costume and allow 6" of room for adequate movement.
With a permanent marker on the front side of the costume, mark the snap placements on the inner flap created in Step Six. Mark the placements about 0.5"-1" out from the stitching. One snap should be at mid-thigh height. Two snaps, about 4" apart, below the armhole. Two snaps, about 4" apart above the armhole. One more snap in the middle of the space between the previous snap and the top of the costume.

Inserting snaps - front and back
Before inserting any snaps, fold the costume back right-side out, so that the inner flaps touch. Mark the corresponding snap placements to the other side of the flaps (if you've marked the front half of the costume, you need to make sure the back side is marked so that the snaps will align when you insert them). I did this by holding the two flaps together and pushing a pin though the marked side. This let me mark the exit hole of the pin -- the placement for the other half of the snap.
Insert the snaps and press them in place. The snaps should be in the flaps and not visible from the outside (right side) of the costume. Use female snaps on the back half of the costume and male snaps on the front half.
If you do not have access to a snap press, you can also use metal snaps (the ones that hammer in place) or velcro. The most important thing is to make sure that the closures are placed close to the stitching from Step Six, and that there are no side closures placed below mid-thigh height, otherwise the person wearing the costume may experience mobility issues with steps.

Setting the snaps
Pro-Tip: Use a darning needle to enlarge the hole in the felt BEFORE placing and pressing the snap. This will help ensure that the snap presses properly (and more easily) without damaging the snap or the material.
Step Eight: Cutting the head hole.
This step is best to do once the person wearing the costume is awake. Don't ask me how I know this, but it involved some hysterical tears and a fair amount of coaxing a 2yr old back into peaceful slumber.
Remember back in Step Three, when I said to make sure that one of the long wavy meat pieces went down the center of the costume? This is the piece where the head hole will go. The easiest way to mark the placement, is to open up the costume, spread it flat on the floor, and have your child lie down on top of the wrong side of the front half, with their arms straight out from their sides where the arm hole placement is on the costume sides. Mark the tops of their shoulders.

In the center meat piece, cut a long narrow oval from shoulder height about 8"-9" in length. The oval only needs to be 2"-3" wide, as it will stretch from side to side to allow the head to pop through. If you want to be fancy, you can stitch around the hole to prevent the felt from stretching or losing its shape. I was in a hurry and didn't bother.
Step Nine: Adjusting the length of the costume.
My kids like to wear their costumes more than one year in a row, improving and adding on to them each subsequent year. Because of this, I made this costume extra long. You can do this to.
To adjust the length to fit my little person, I had her try on the finished costume. I folded the bottom up on the front and the back to where I wanted it to be for this year and marked it. I added three snaps (one on each edge and one in the center of the panel) to snap up the extra length out of her way. If she needs it longer next year, I'll either unsnap it or put new snaps a little lower to hold the bottom edge up out of her way.
Slacker Mom Tip: Snapping the bottom up out of the way like this TOTALLY hides that unhemmed bottom edge, but don't tell my Home Ec teachers I told you so!
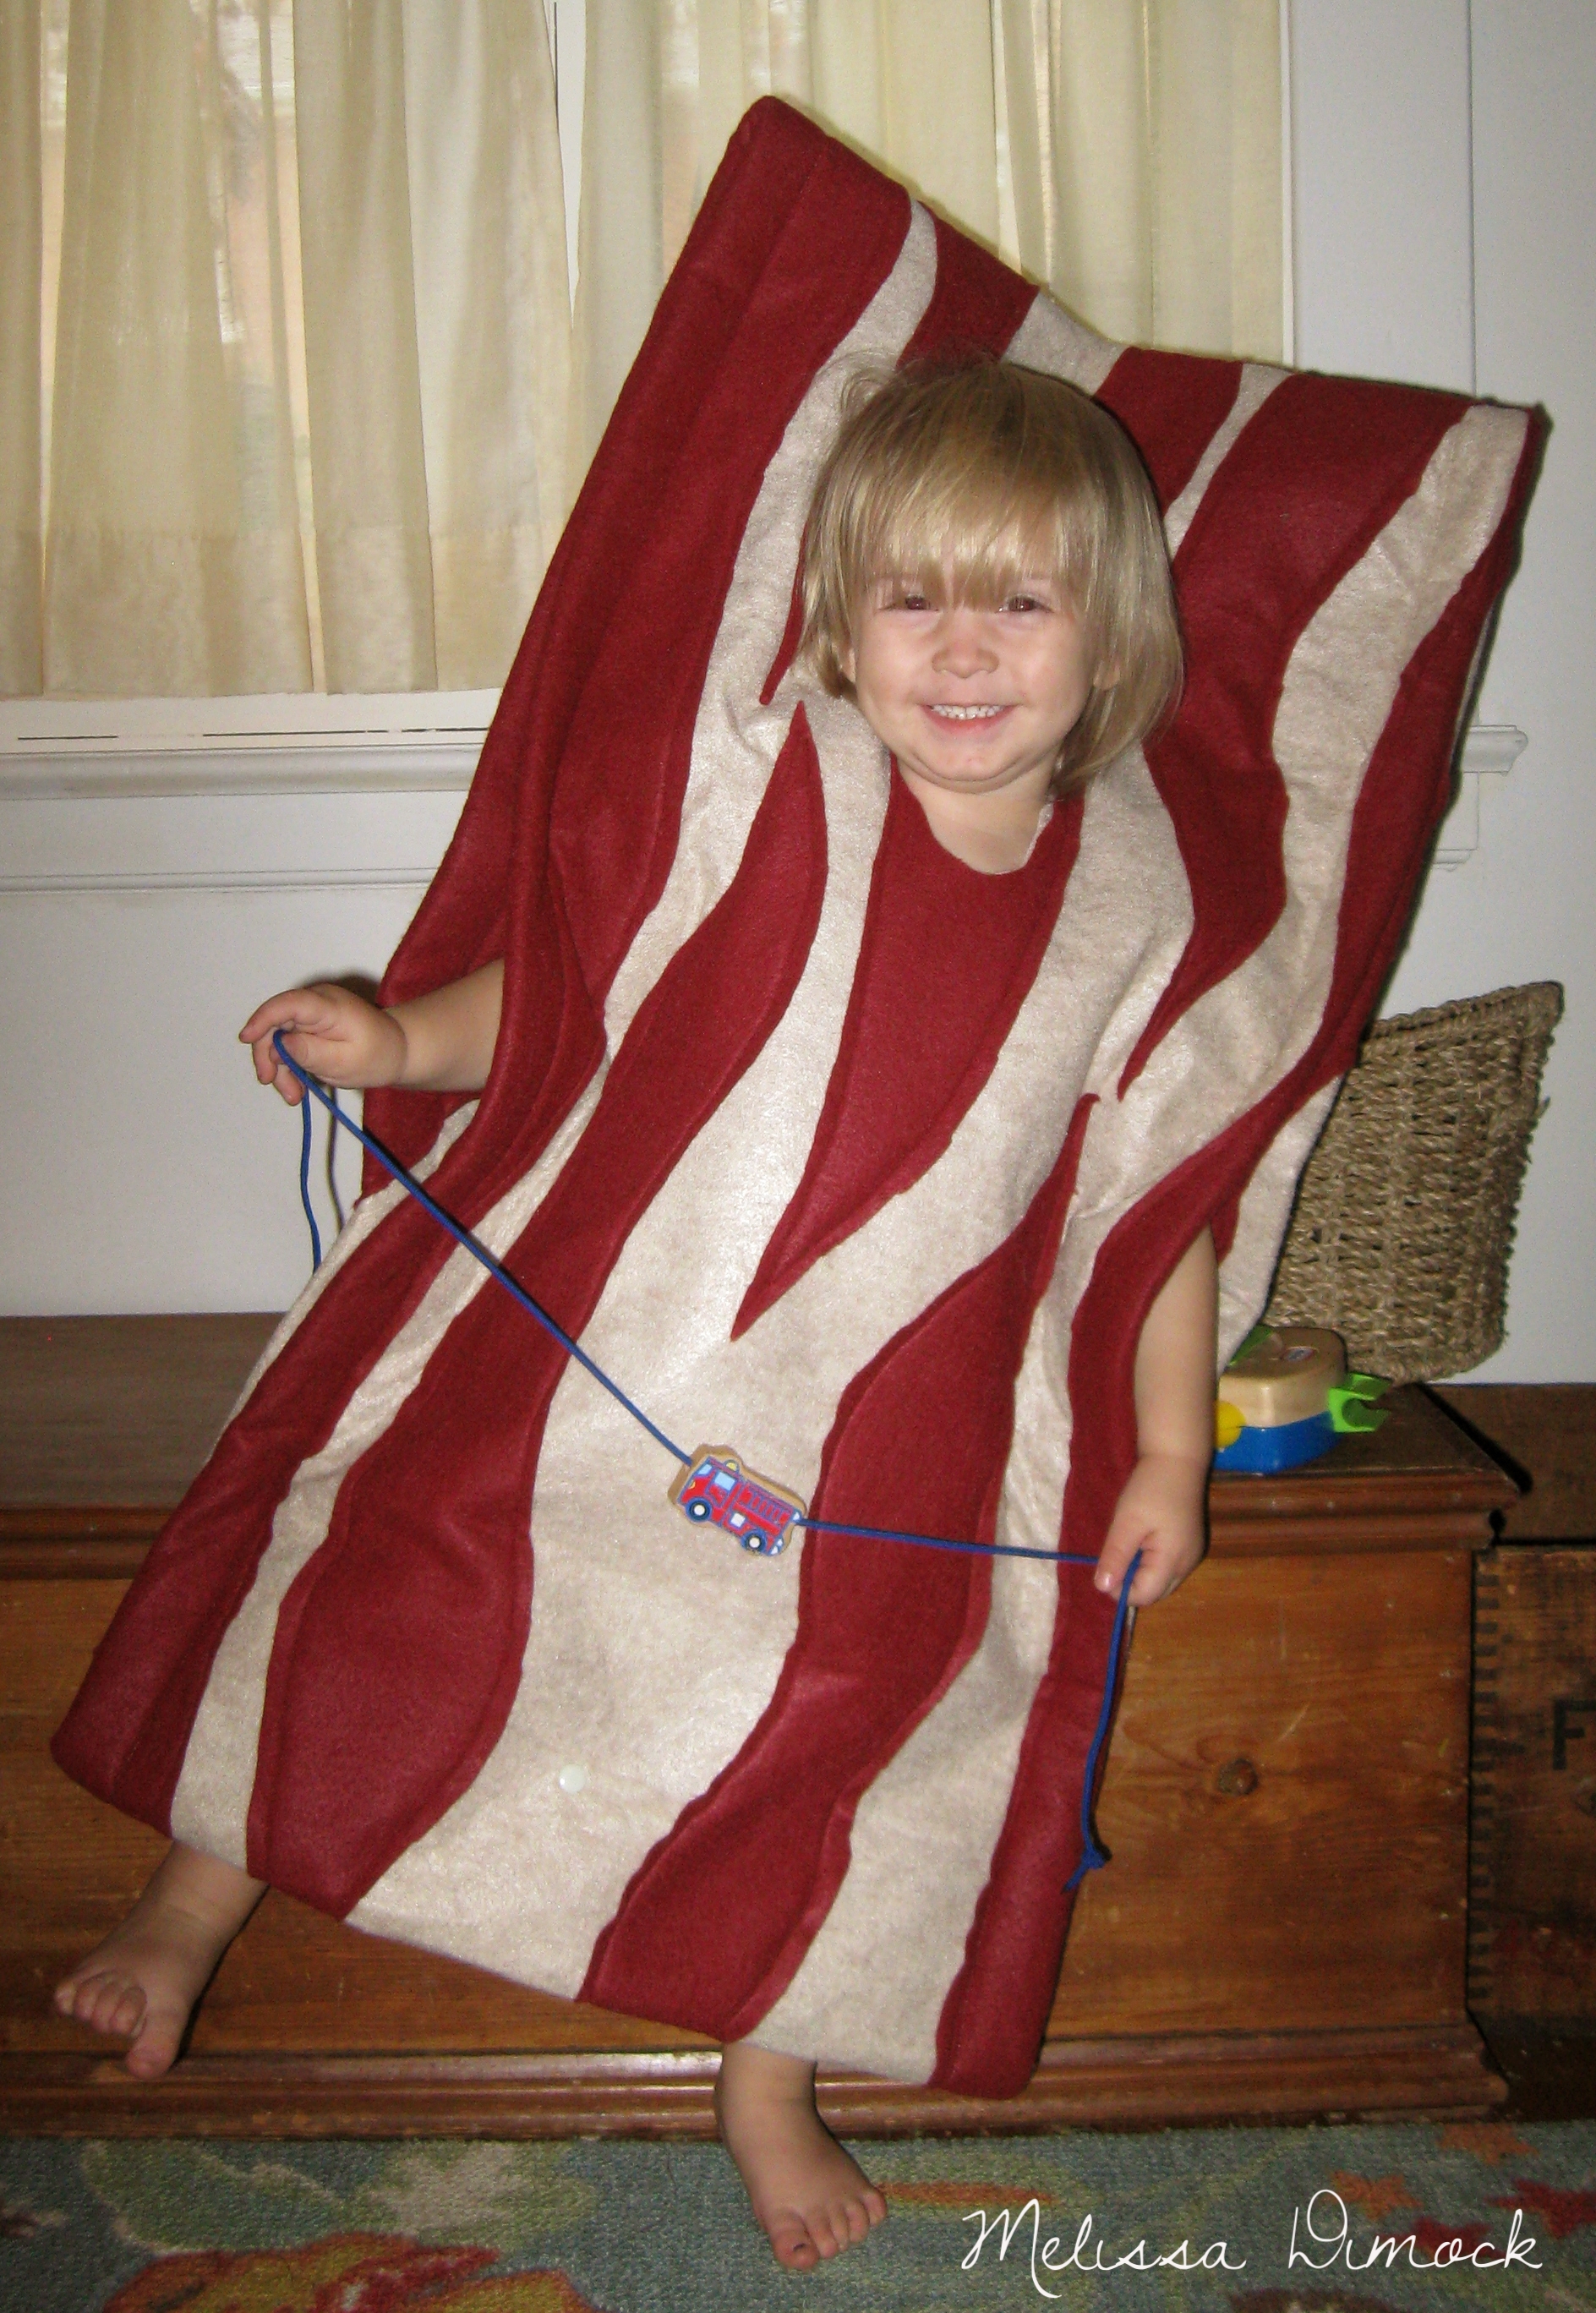
The verdict? Kid#3 was in her glory, with everyone exclaiming over her homemade costume. I was thrilled that it kept her warm and was easy to put on over her cold weather clothing. Her older siblings were jealous that Bacon Baby got twice as much candy as they did.
Of course, that means that next year they might let me "help..
"Muwahahaha," indeed. ;)
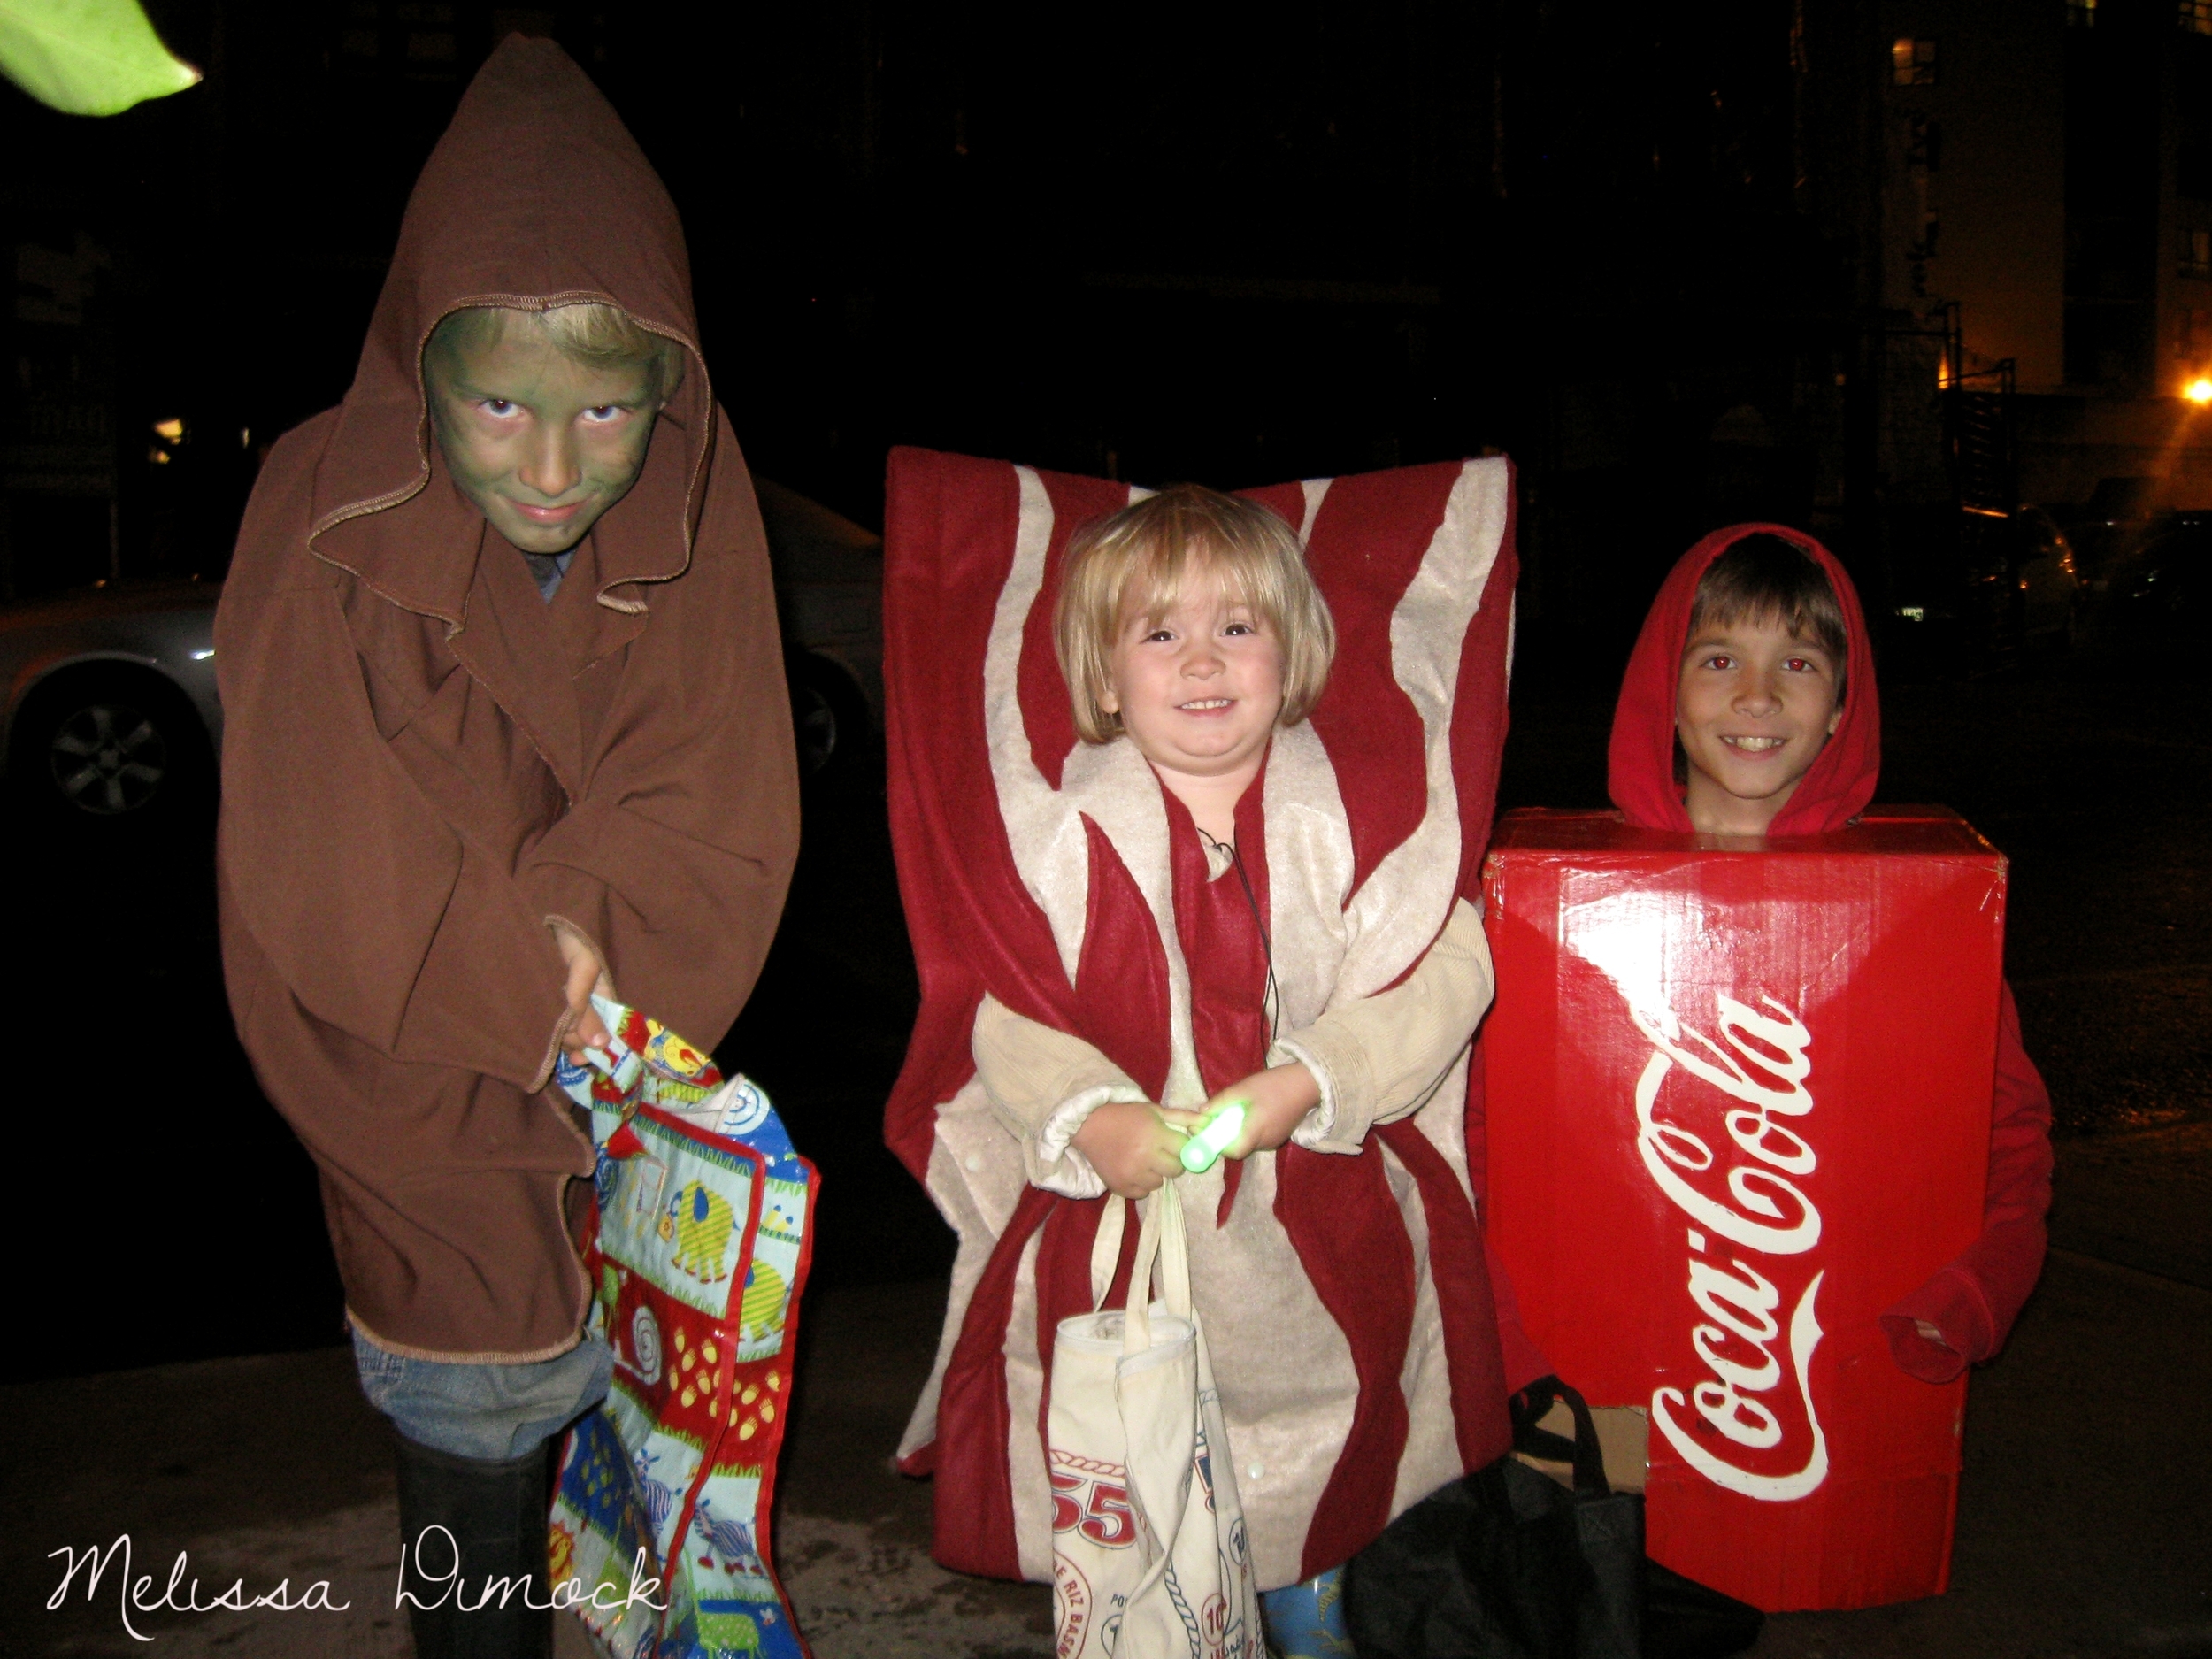
Kid#2, Kid#3, Kid#1 and their homemade costumes