DIY: Narwhal Cake

I love a good birthday cake challenge, and was thrilled when #Kid4 requested a narwhal cake for her 3rd birthday -- likely inspired by her older siblings' obsession with The Narwhal Song.
As always, I didn't have much of a plan, but I did document the process for anyone else who needs to make a Unicorn of the Sea! (I have included affiliate links to the products I used to make it easier for you. I get compensated if you make a purchase at no extra cost to you so I can continue to bring you more great recipes and tips.)
What you need:
Bake the cake according to your chosen recipe's directions, being sure to adjust the baking time for the different sized layers. Allow to cool completely before starting the next step.
Once the cake is completely cool, slice the top off of the 8" layer to create a level surface. Reserve the removed piece to use in the top layer. Position the 6" layer on one side of the cake and cut the reserved trimmings to fill in the space around it to create a sloping head for the narwhal.
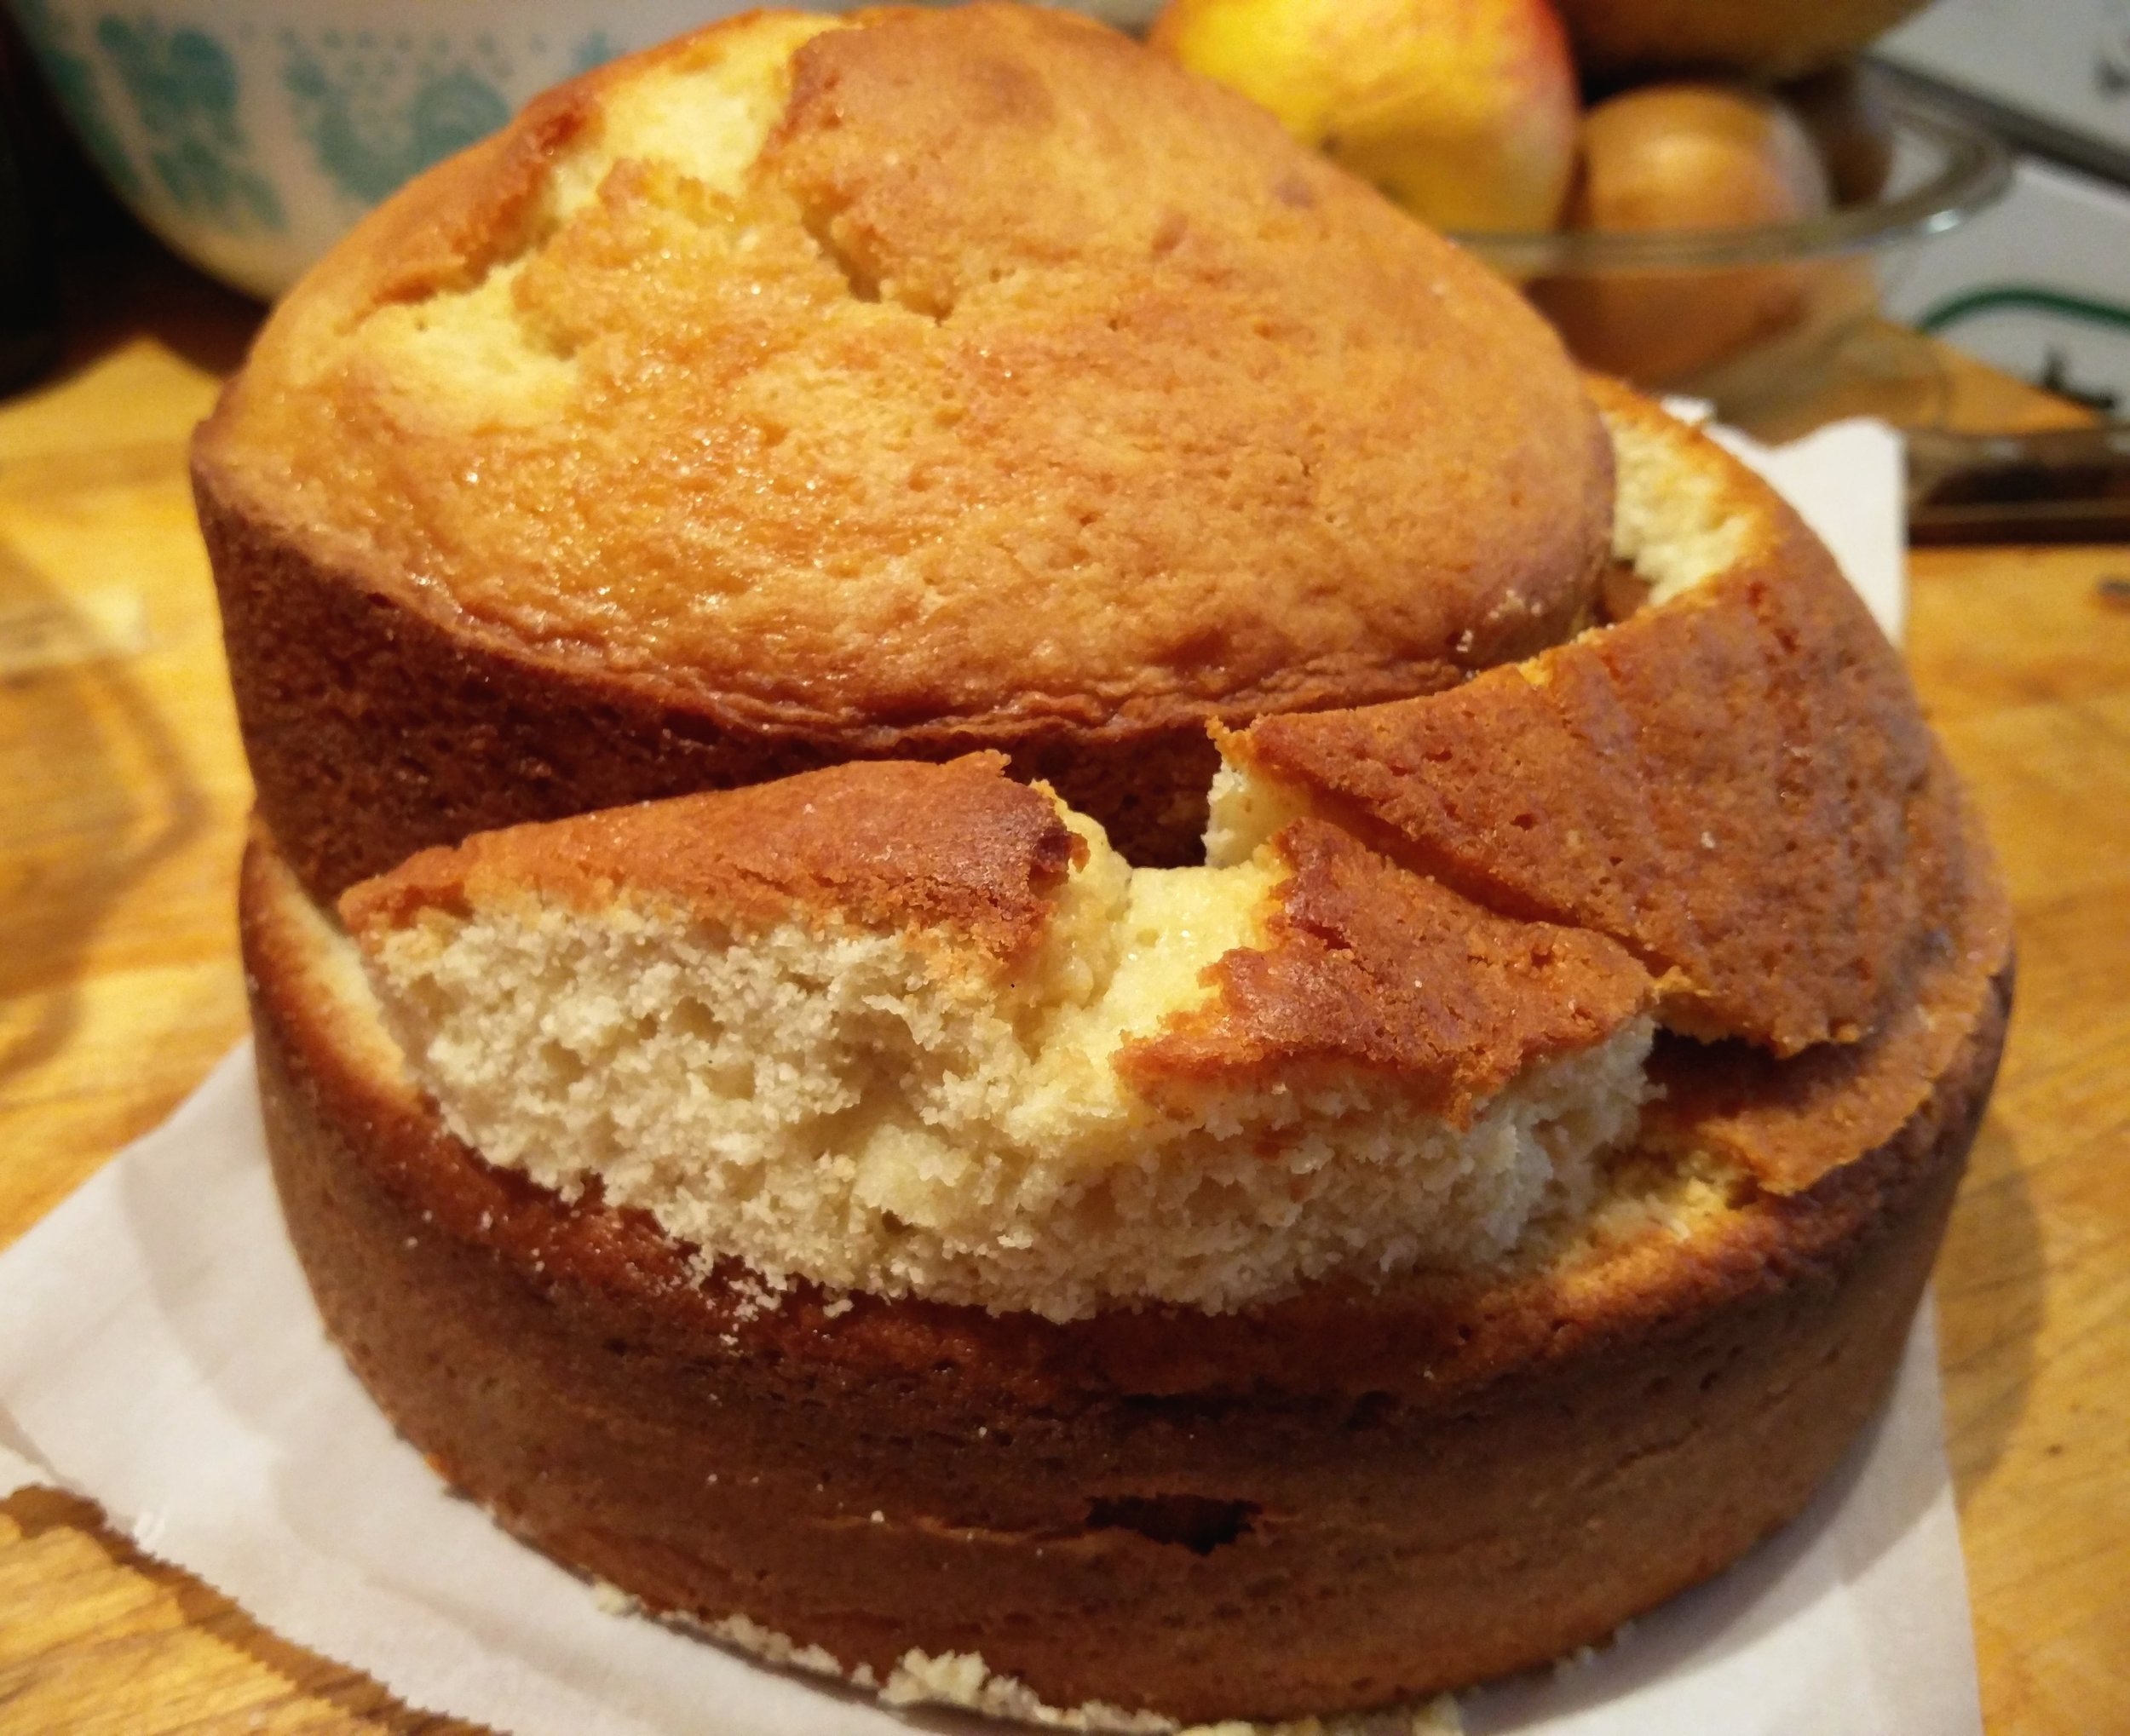
Using approximately 1/3 of the buttercream icing, stick the top layer to the bottom layer, and use the icing to glue the smaller pieces into place. Use another 1/3 of the icing to coat the cake and smooth out and fill in any lumpy spots -- be generous!
Cover the remain 1/3 with plastic wrap and set aside for decorating.

Open the package of fondant and knead it according to directions. Once it is soft, you can add the colouring. I love the set I linked above - it has a guide inside for the necessary ratios for blending, and makes it easy to get the colour you want.
For something like fondant or small quantities of icing, I use a toothpick tip to measure out drops instead of using drops from the bottle to make sure my colour isn't too dark. Knead until the colour is worked evenly through the fondant.
Roll out the fondant on a piece of parchment paper with a rolling pin until is is approximately 1/4" thick, then place it on the cake. Smooth out any air bubbles or lumpy spots, starting at the top of the cake and working down to the bottom. Trim the excess fondant.

Now the fun begins!
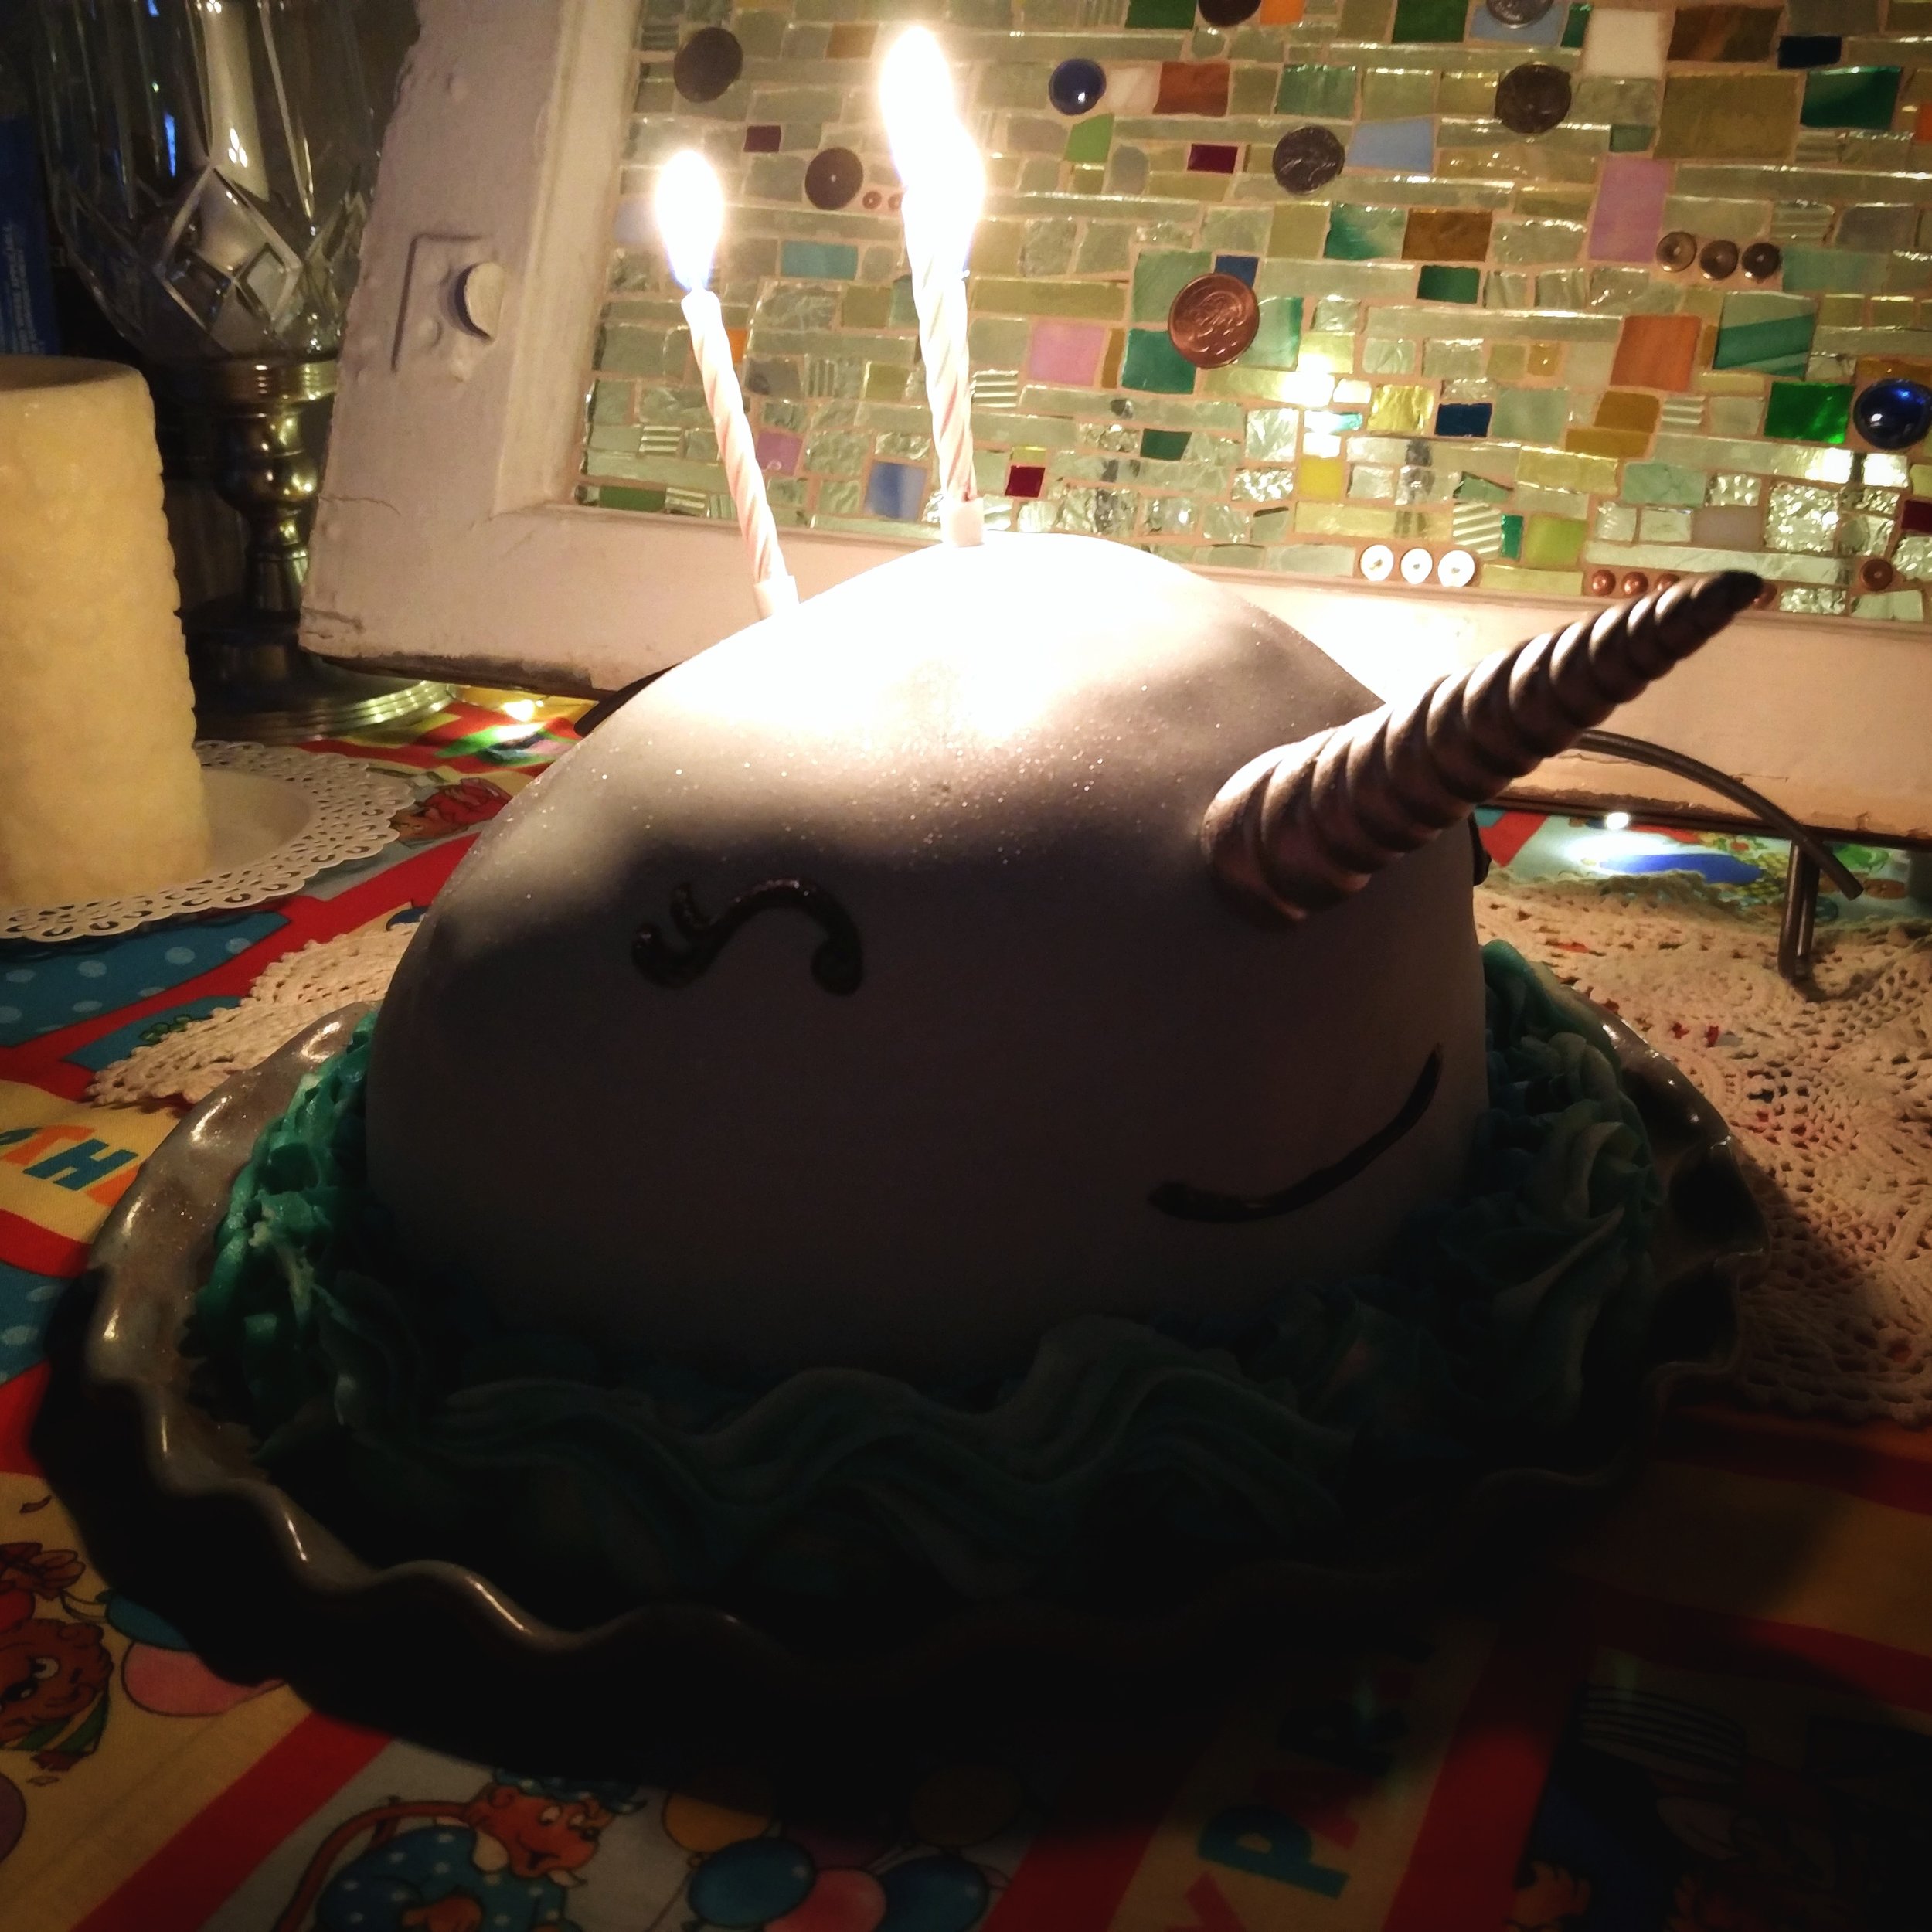
Using a puffy paint brush (like a blusher), apply a light layer of shimmer to the top and sides of the cake.
Using the black glitter gel, draw two eyes and a mouth to your cake -- I suggest practicing on a piece of parchment paper to avoid mistakes, because the black icing can stain the fondant.

Take the unicorn horn from the cake topper set and determine where you want it to be placed. I removed the horn from its plastic base and used a 6" skewer to anchor it to the cake for more support.
Divide the remaining buttercream icing into thirds. Tint one portion dark blue, another portion blue-green, and leave the remaining portion white. Fill your icing bag with dark blue, followed by blue-green, and add the white last. Using a large star or rosette tip, pipe the icing in waves around the cake.

Now sit back, relax, and bask in the compliments -- your Unicorn of the Sea is complete! All that remains is to add the candles, make a wish, and blow them all out.